Reading the sky
The sky is what Asterarium is built around. Choose where on Earth you are standing and what moment you are looking at, and it draws the sky that was — or will be — really there. The sky over Stonehenge ten thousand years ago and the sky over Tokyo next Friday take the same two steps.
This chapter covers moving your view, setting place and time, switching the display, screening mode, and sharing or capturing what you see. Building a show out of several skies has a chapter of its own, Sky Tours.
Looking around, closing in, picking things out
Drag to look around. It does what turning your head does: your bearing and how high you are looking change, nothing else. The wheel — a pinch on a phone — narrows your field of view and brings a cluster or a line of planets closer. The + and − at the bottom right do the same, and the number between them is your current field of view in degrees. That number is itself a button: press it and you are back at the standard 60°, which is the way home when you have lost track of how far in you went.
Click or tap a star, a planet, or a deep-sky object to select it. A card appears with its magnitude, the constellation it belongs to, its bearing and height right now, and its right ascension and declination; planets and the Moon also carry a distance. The most useful line may be Below horizon: when the thing you were after has set, the card tells you which direction it will rise from and at what time. A star card with a Hipparcos number also offers Fly to this star in 3D →, which hands you to Starflight and takes you out to it.
If you already know the name, use the magnifier at the top right — Search the sky. Type a star, planet, deep-sky object or constellation and the camera swings toward it over about a second and a half. If what you picked is well below the horizon it does not point at the ground: it turns to the bearing the object will rise from, and waits there.
If you look straight up and lose your bearings, open the menu and choose Re-center view under Experience. Your direction is kept; only your gaze comes back down to mid-sky.
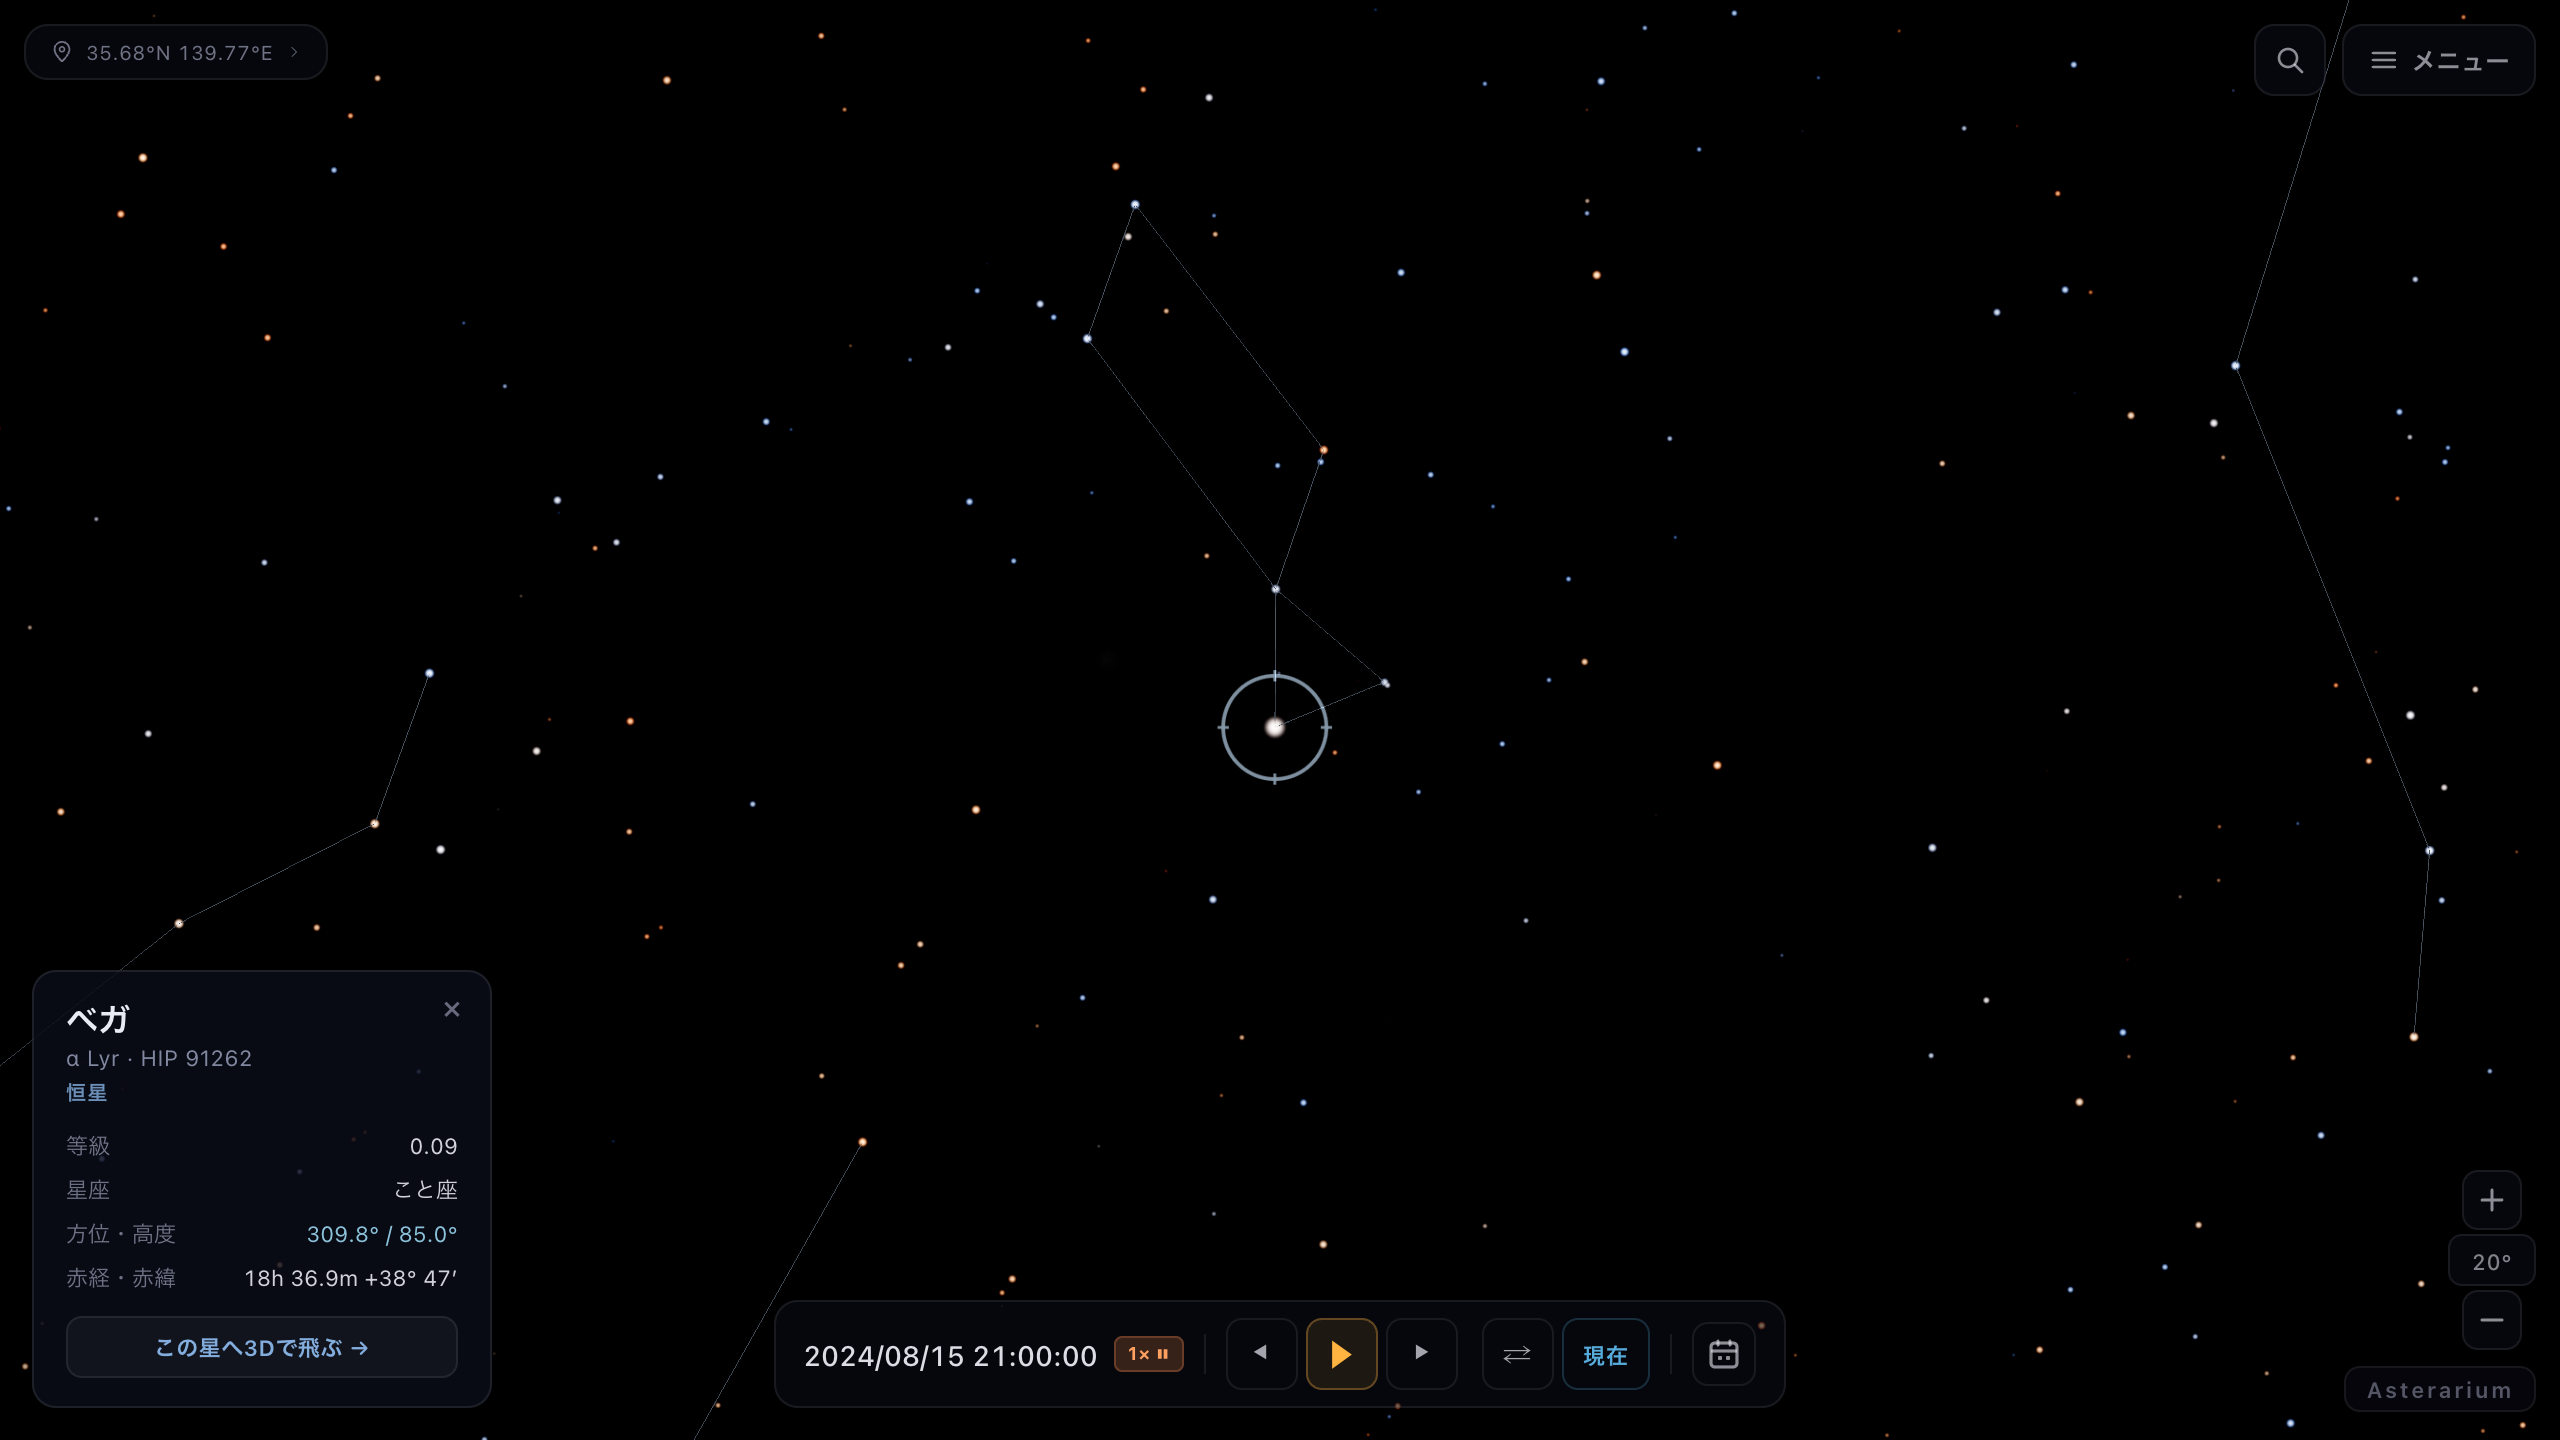
Vega selected: magnitude and coordinates, plus the way through to Starflight.
When and where you are standing
A sky is settled by two things: where you stand and which moment you are looking at. Place lives in the chip at the top left, the one showing your location name and coordinates. Press it and Change location opens with a globe permanently on view — click the part of the world you want and that is where you now stand. To name a city instead, use Search; to type coordinates, Manual takes latitude, longitude and elevation in metres; and My location has a single Get my location button.
Time lives in the bar along the bottom. Play and Pause start and stop the flow; Slower and Faster on either side step the rate one notch at a time. It climbs from 1× through 1 min/s, 10 min/s and 1 h/s, and the bar tells you where you are. Reverse runs the same rate backwards, and Now returns you to this instant, where a LIVE badge lights up. If you want to watch the stars move, start around 1 h/s — that is where the daily rotation becomes something you can see.
To jump to a particular moment, open Jump to date/time from the calendar button at the right end of the bar. Type a date and a time and press Apply — or take one of the three shortcuts: Tonight 21:00, Next sunset, and Next full moon. Tonight 21:00 is the fastest route to the sky you will actually walk outside and see; Next full moon is the fastest route to a sky with a Moon in it.
The menu's Sky group also holds Today's Sky — tonight's highlights, sunrise and sunset, the Moon's phase, in one place. It is a good starting point on a night when you have not decided what to look at.
Choosing what the sky shows
What gets drawn over the sky is decided in Display settings, in the menu's Sky group. Seven switches — Constellations, Const. labels, Star labels, Milky Way, Atmosphere, Ground, Deep-sky objects — turn on and off independently. Learning the constellations means turning the lines and names on; checking what you will actually see means turning them off. The two tasks want opposite things, so switching is meant to be cheap.
Atmosphere and Ground change what kind of sky it is. Turn the atmosphere off and the stars stay visible through the day; turn the ground off and the celestial sphere continues under your feet, so you can see how the stars below your horizon are arranged. Grid offers None, Equatorial and Horizon: the equatorial grid is the stars' own coordinates, the horizon grid is your bearing and height, and putting each over the same sky shows how differently the two carve it up.
The light-pollution slider runs from 0 to 8. At the left, Pristine is a mountaintop with no artificial light; at the right, City center is the middle of Tokyo. Drag it end to end without changing anything else. The Milky Way goes, and the star count falls to a few dozen — a demonstration that what a city takes away is not the stars but the sky.
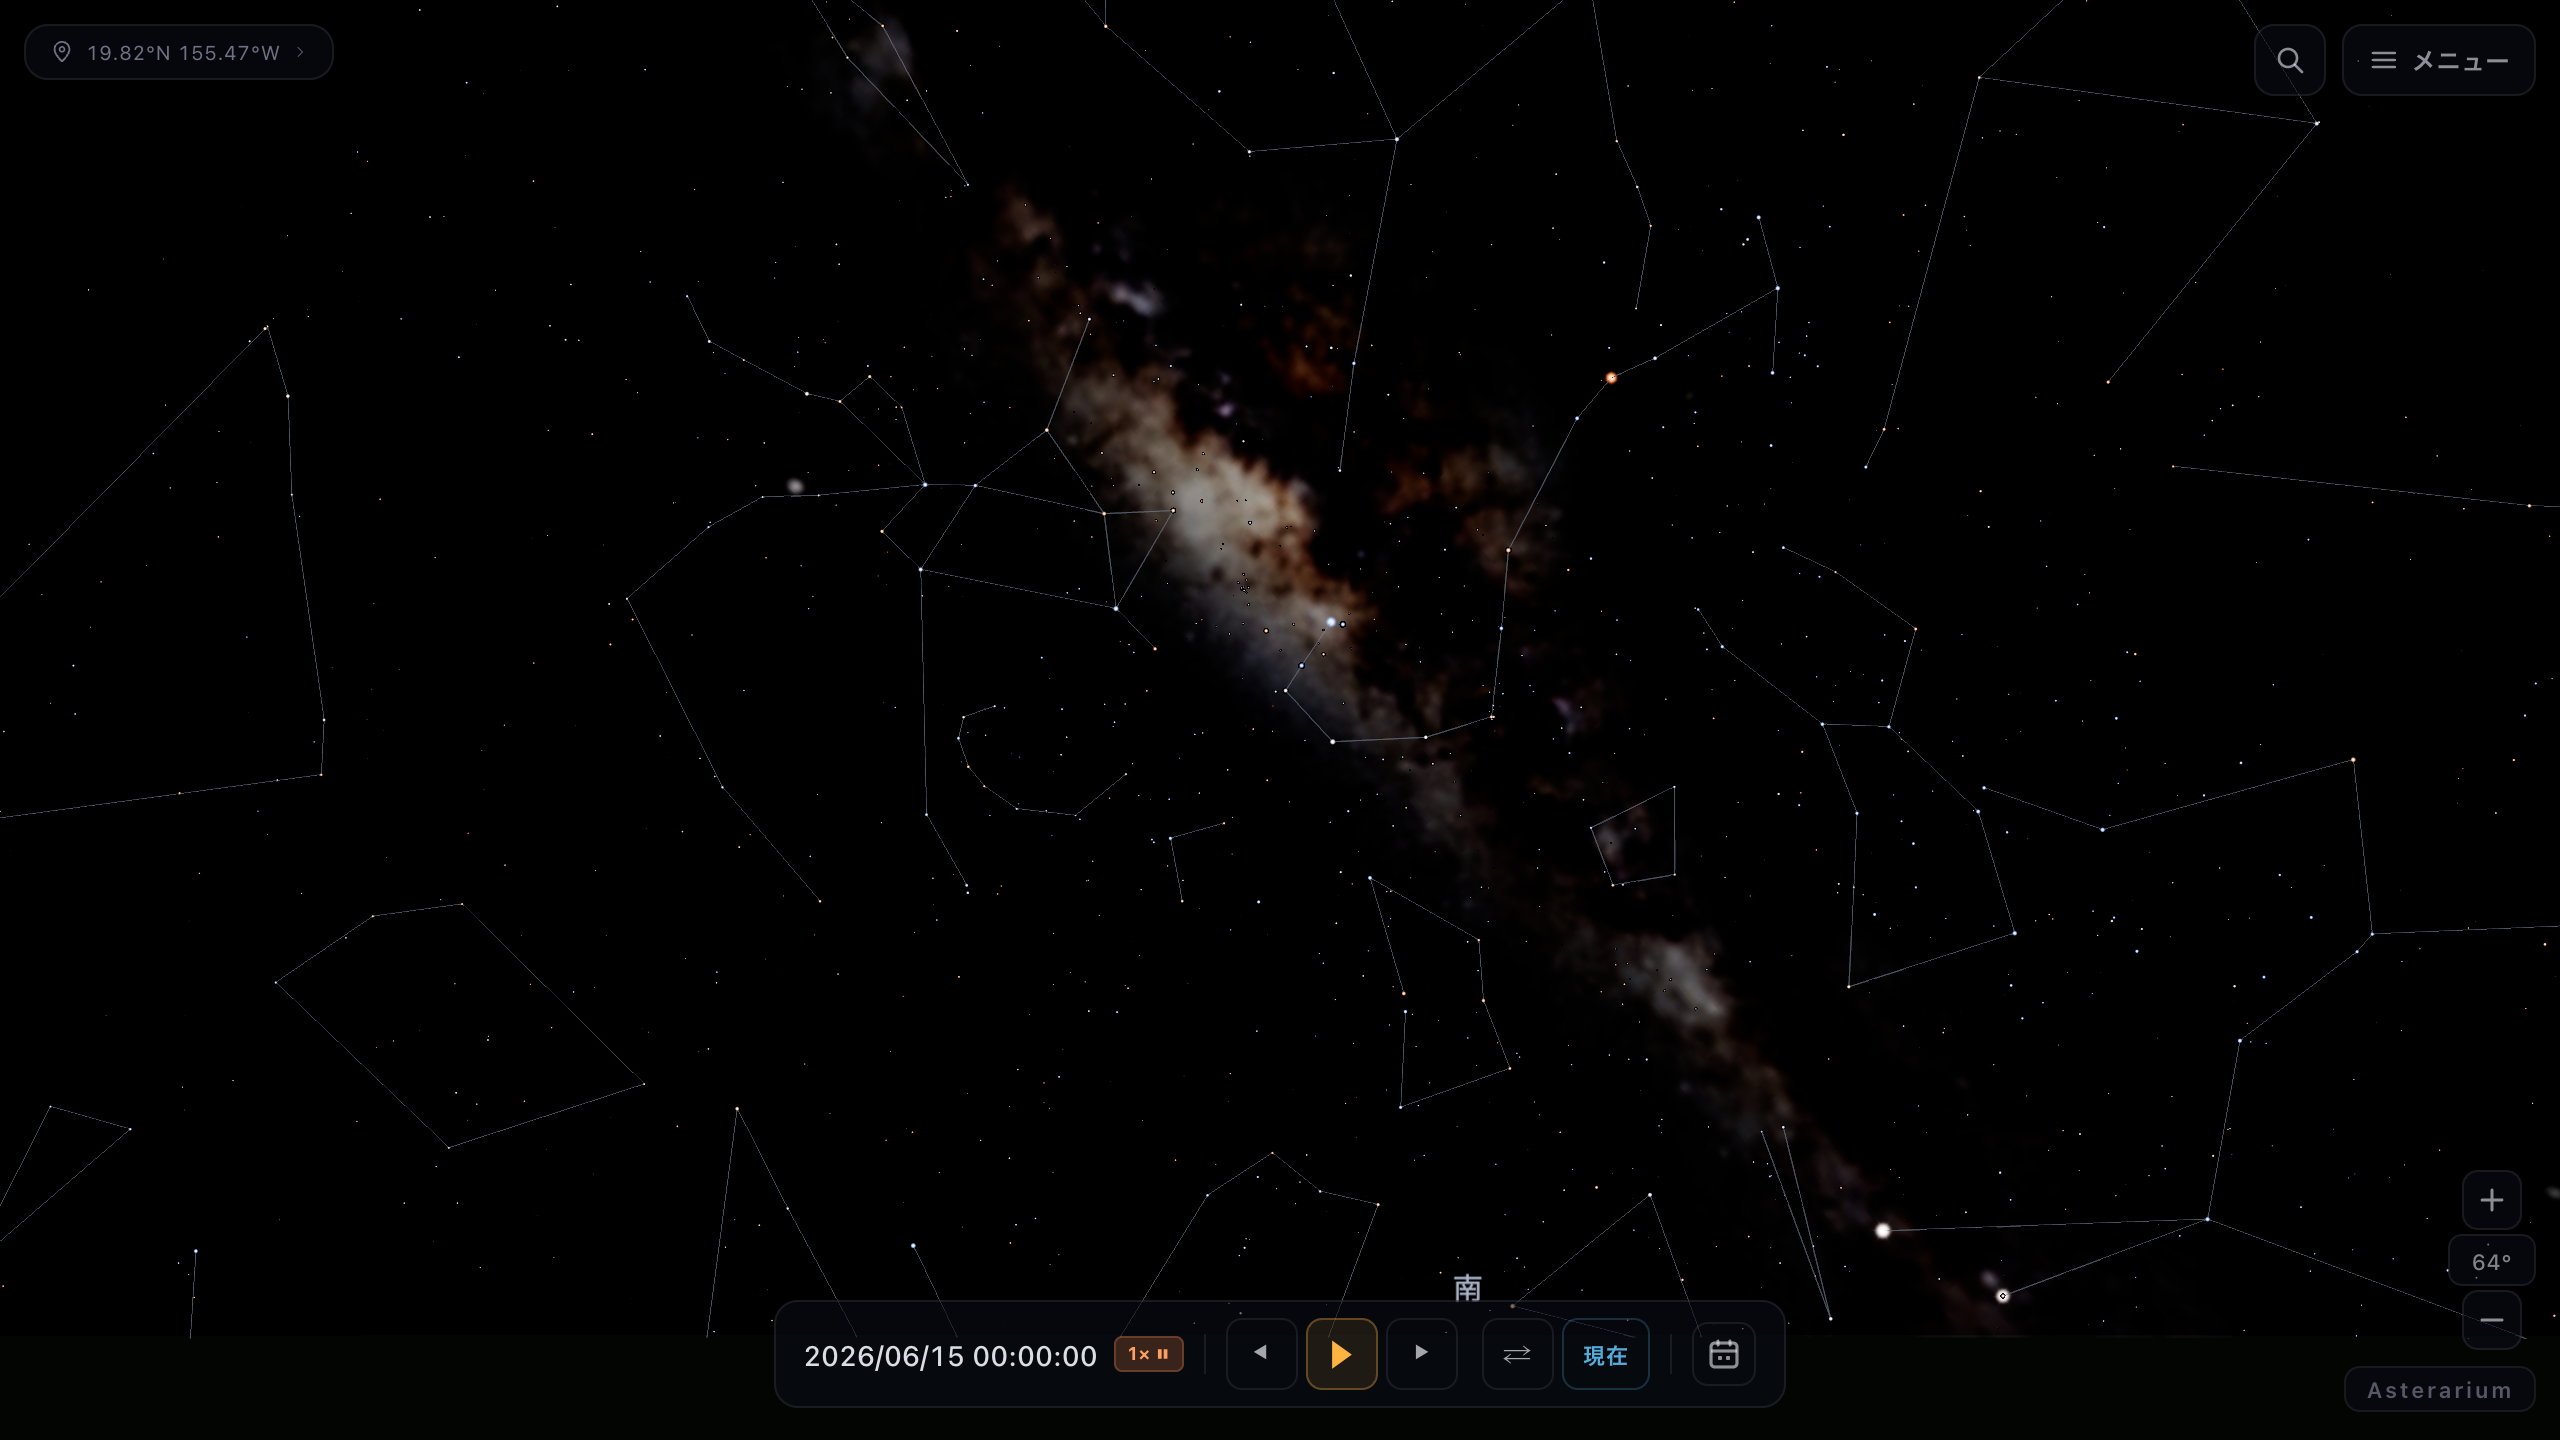
The same sky, the same direction, at light pollution 0. The Milky Way runs through it like a spine.
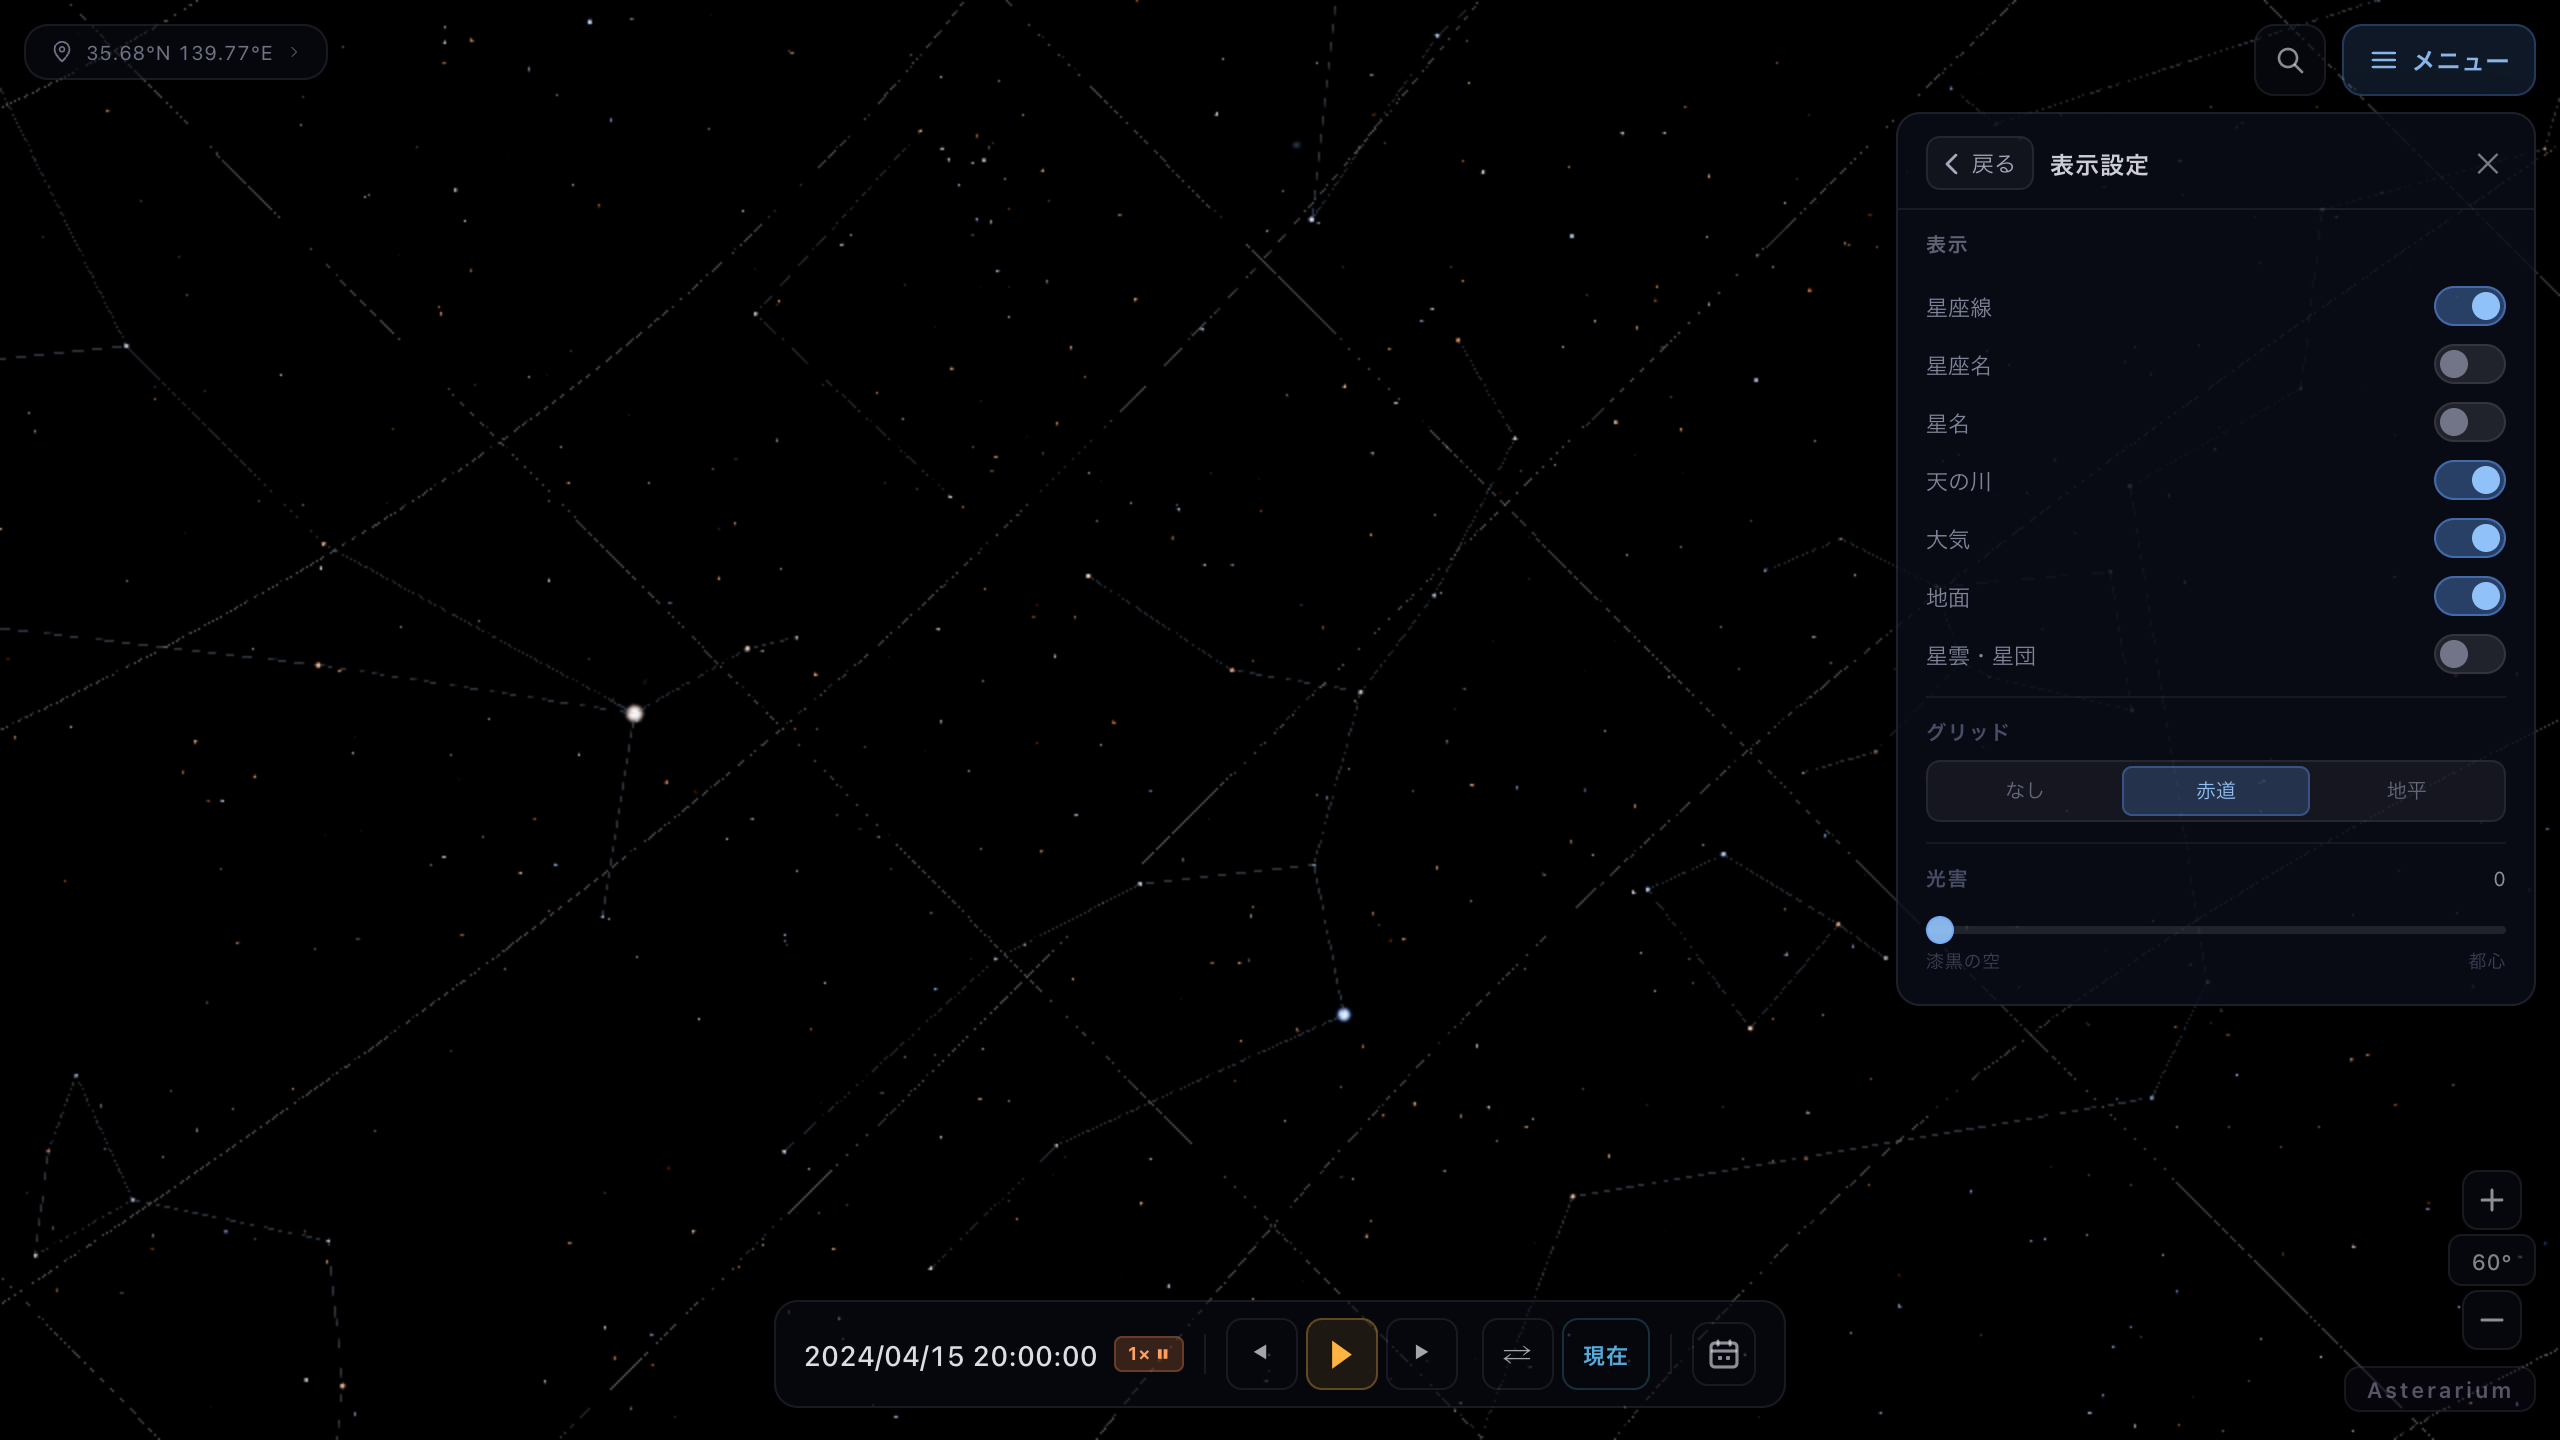
Grid set to Equatorial. The stars' own coordinate system, laid over the sky.
Showing it to a room
When you are showing the sky to someone, the controls are in the way. Choose Screening mode from the menu's Experience group: the view goes fullscreen, and after about three and a half seconds of stillness the interface fades out, leaving the sky. Move the mouse or press a key and it comes back. This is the state for a projector in a meeting room, or a sky left up on a television.
To take the controls away entirely, press Hide UI. From then on activity no longer brings them back — the sky simply stays. When you do want them, move the pointer into the top-right corner of the screen and wait a moment: Show UI and an ✕ appear.
Auto pan sets the view slowly turning on its own, so the sky keeps moving with nobody touching it — useful when it is going to be up for a long while. It pauses the instant you interact and resumes once you stop.
Leave with the ✕ at the top right, or with Esc. The screen is kept awake for the duration, so nothing will go to sleep mid-show.
Working faster with the keyboard
If you work at this for a while on a computer, the keys are quicker. Arrow keys pan the view and + and − zoom. Space plays and pauses time, and R reverses it. Keys 1 through 4 each select a fixed rate, with 1 returning you to live.
Press ? and the whole list appears on screen; Esc closes it. You only ever have to remember the question mark.
On a phone, held up against the real sky
The controls do the same things: drag to look around, pinch to zoom, tap an object to select it. The location, date-and-time and search panels arrive as sheets from the bottom of the screen.
One thing belongs to phones alone. Press Point at the sky at the bottom right and the phone's own orientation becomes the camera's. Go outside at night and hold it up: the pattern on the screen lines up with the pattern overhead, which is the most direct way there is to find out what that bright thing actually is. If the bearing looks wrong, double-tap to take a fresh compass reading. Back to manual returns you to ordinary touch control.
The button only appears on a device that has an orientation sensor, so it is not there on a computer, and your browser may ask permission the first time you use it.
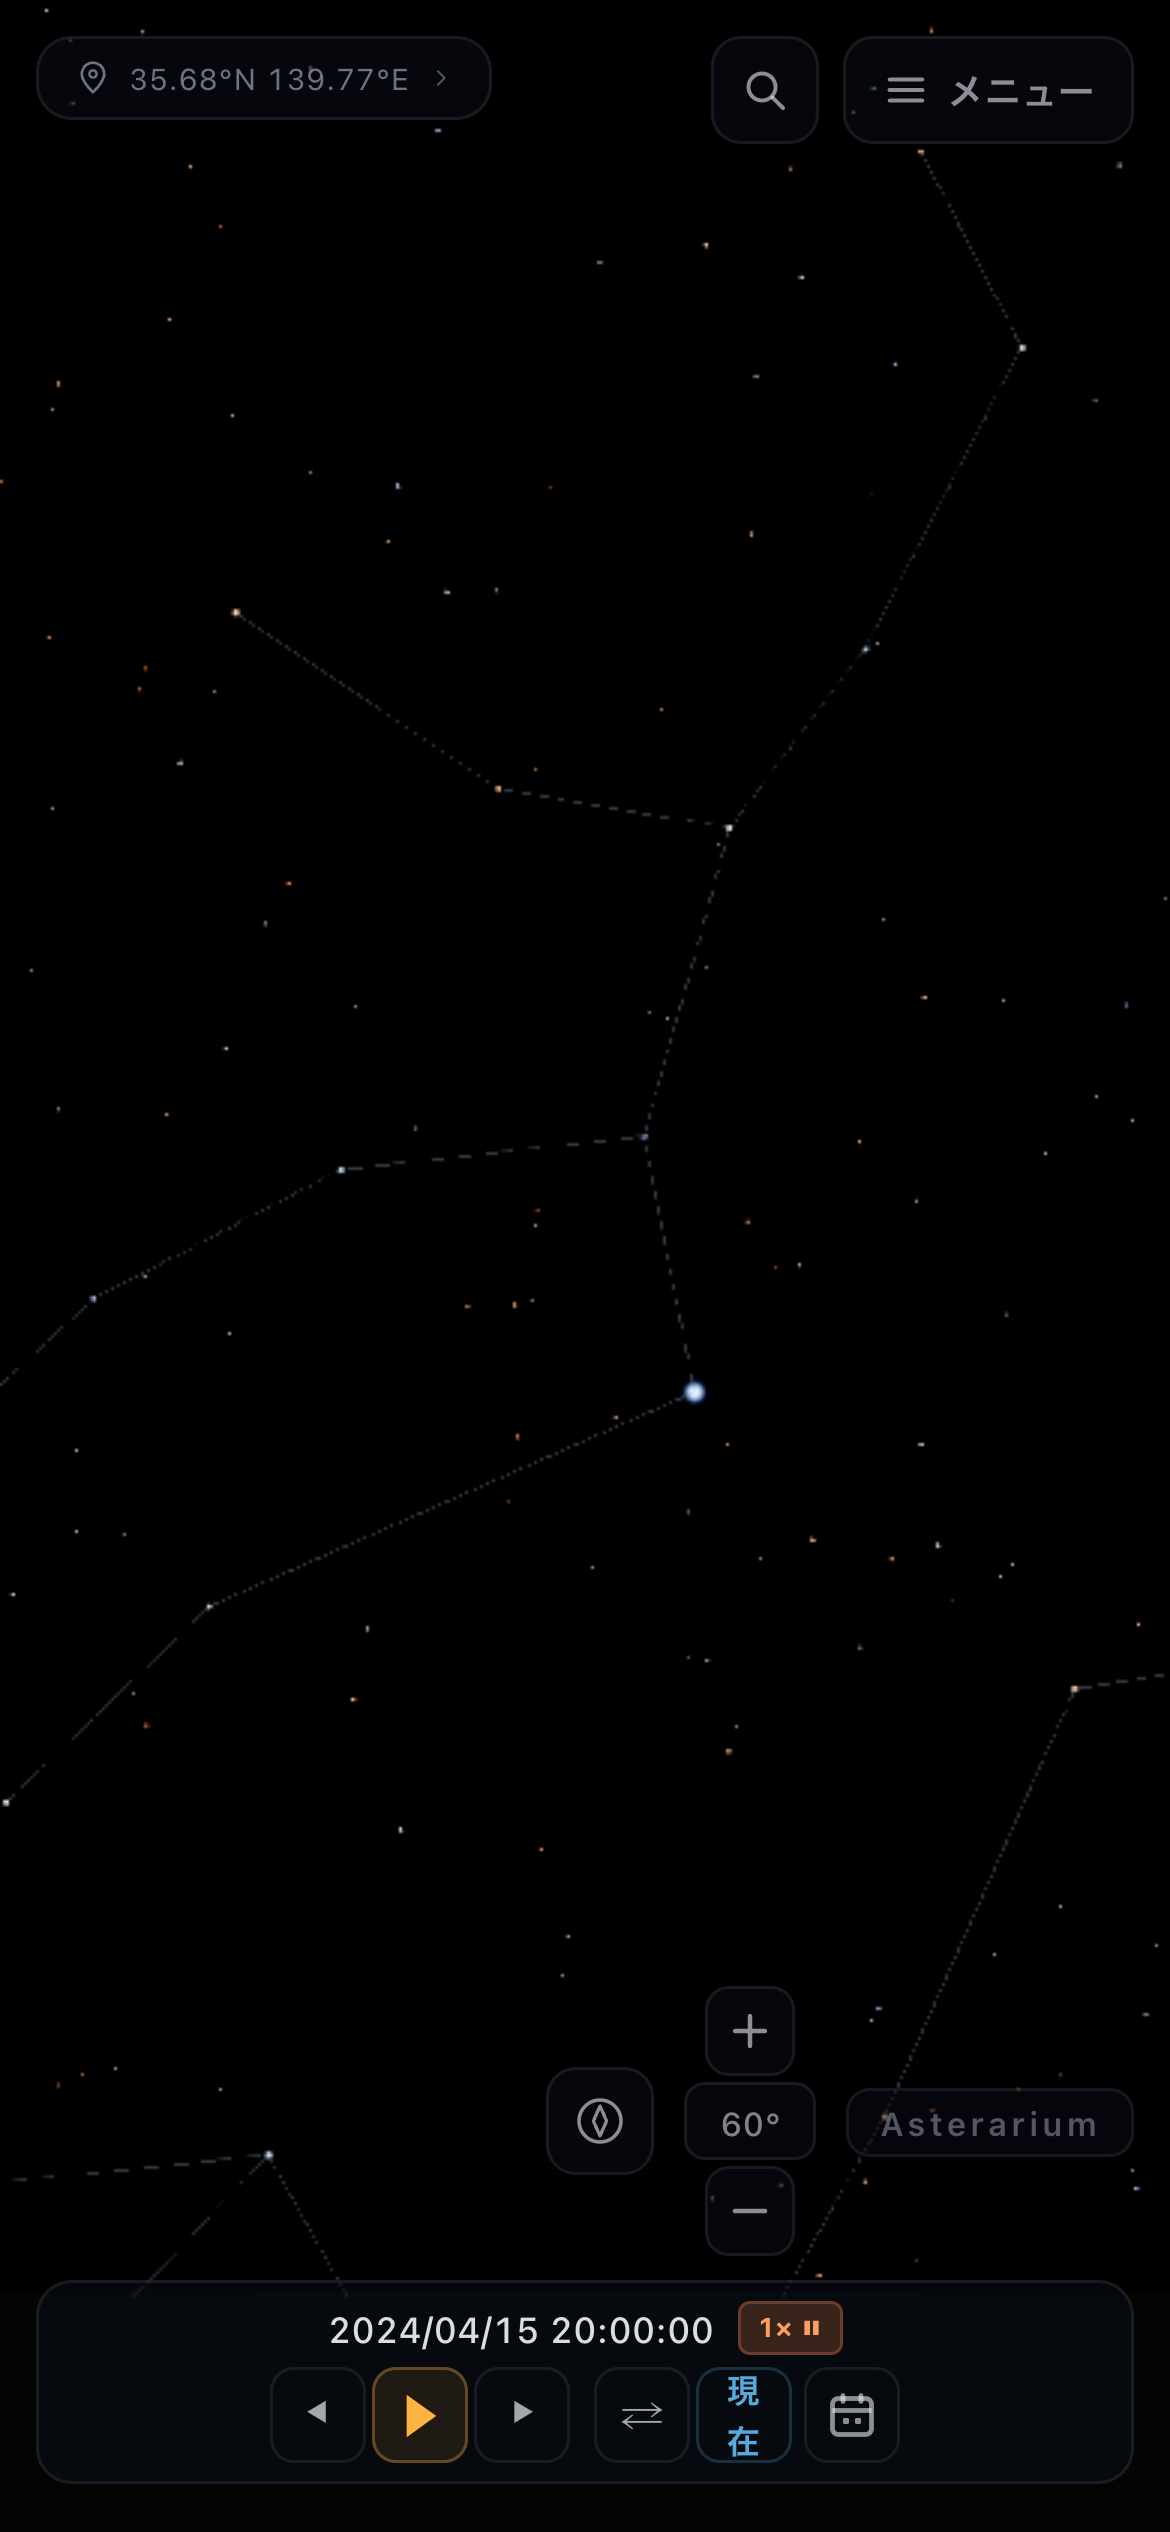
The phone layout, with the sensor, zoom and wordmark row sitting above the time bar.